Legendary Swords is a brand new adventure inside of
Poptropica where you battle robots who are trying to take over the islands of Poptropica. The way you fight them is by using a series of legendary swords that are very powerful. The different swords are found as you continue the adventure. Legendary swords is more of an action style game within Poptropica and requires more reflexes, timing and skill than the normal island quests. It’s one of the first adventures in Poptropica that uses combat.
The Swords
In the first installment of the adventure, there are two different Legendary Swords you will find. The first is inside the cave at the beginning. It is in a rock down on the cavern floor. The second appears at the end of the battle with the first major boss. The two swords are:
- The Rusty Relic, a two-star power sword
- The Bolt, a four-star power sword
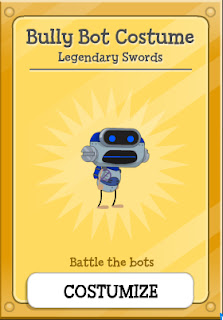
If you have any costumes from the Poptropica Store that came with swords (such as the different Knight costumes, or the Masked Hero costume), you will be allowed to use those swords as well in the game. Here’s a list of the different swords you can use. All of them are three-star power swords.
- Templar Knight
- Masked Hero
- Ninja
- Pirate Sword
- Laser
- Earth Knight
- Dark Knight
- Skullduggery
First, purchase the Legendary Swords gold card if you haven’t already. It is currently Free+, which means it is free for everybody but members get extra benefits. Click on visit.
The intro is like a movie, it even shows the title like a movie!
You’ll fly around space, passing Pewter Moon, Ice Planet, and Lava Planet in the process. Then, you’ll come across a jungle planet (not the mechanical jungle planet). You’ll say that space is so peaceful.
As if on clue, you can see explosions coming from the planet. Curious as you are, you go down to investigate.
When you arrive, you see a bunch of alien animals running away from… something. You’re even more curious now.
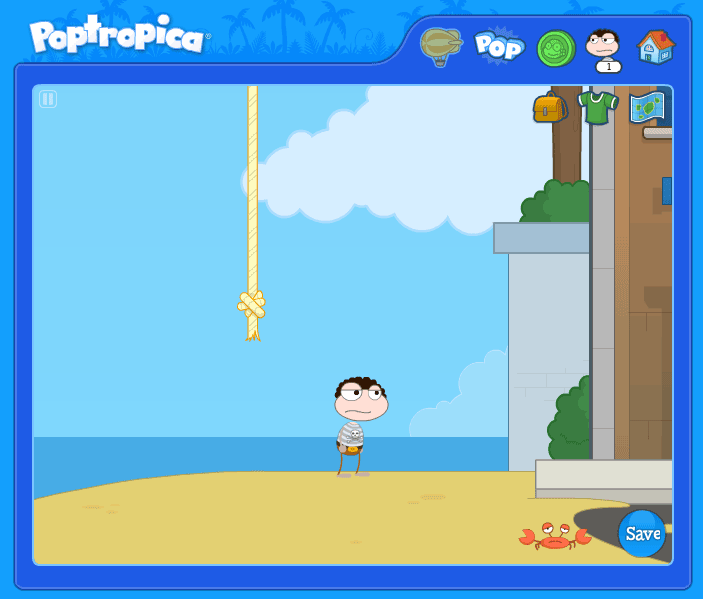
Go to the right, and then go up. You’ll notice a cave. Go in.
Navigate through the cave. Drop then go to the left to see a hidden thing that isn’t important to the plot: a broken robot. Yikes.
Go to the right and go up, and you’ll see bats fly away. Creepy. Go to the right.
Continue going right. A pop-up will appear on the bottom, pointing out the stone in the stone. Click on it to recieve the first storyline sword in the game.
When you go to the right a little, you’ll encounter your first health crystal in the game. Whack it with your sword until there’s nothing left. Somewhere in this cave, if you go to a section with bones on a dark cave wall, you may encounter a shiny skull. Click on it to obtain a skull mask wearable item. (The mask is optional.)
Continue on right, and you’ll encounter your first enemy robots in the game: two bats. That third one with the camera on its head? You can’t attack it. Just attack the two other bots instead. Like a little tattletale, the camera bat flies out. You’ll encounter camera bat later on when you encounter your large-sized robots.
If you got hurt, take a health crystal or two, but make sure to use them only when you need to.
Continue on to the right, where you’ll see two robots discussing a plan for invading Poptropica, led by a guy named E. Vile. Sheesh, how many overlord wannabes will be in Poptropica? The “Charge-Bots” I will call them, will notice you. Jump. Attack. You get it. Then, contining on, fighting on, you’ll encounter a “Laser-Bot”. Careful, because hense the nickname, it shoots lasers at you. Fight. Fight your way on through (don’t try to lead the bots into that pond, E. Vile must be smart to make the bots water-proof) and you’ll encounter “Rocket-Bots”, turtle-like bots that shoot rockets at you. Use your sword to deflect the rockets. Fight. Destruct. Fight. Destruct. Heal. Go up. Go right.
Then, you’ll encounter a bigger version of the rocket-bot, whom I’ll call “Momma Turtle” and Camera Bat will tattletale about the human who has been reducing the robot population. Momma Turtle will start attacking now. Go to the middle of the bot itself and attack. There will be targets on the ground every once in a while to indicate where rockets will be heading. Unlike the smaller version, the rockets don’t follow you. Try and make it so that Momma Turtle will be damaged by its own rockets as well as the fury of your sword. Once you defeat it, heal yourself and climb up vines. On the first platform, there is a health crystal. Get it. Along the way, you’ll notice boulders falling, and you’ll encounter Laser-Bots. If there’s multiple ones at once, take your fight to the main ground. It’ll be worth it to know you’d have more space to fight. After you fight a group of three Laser-Bots, you can continue up. Watch out for the boulders. Go up.
will start throwing boulders at you. But for now, it’s only one at a time. Dodge em. Make sure you get to those health crystals first. Fight. Be careful when he starts picking up and throwing boulders like crazy. Go a little bit in front of him and run! When he stops, he’ll pause, since he’s exhausted. Attack. Repeat this a few times, and he’ll explode eventually.
When you defeat Mr. Boulder, the rock next to him collapses, revealing another sword! It’s the most powerful in the game (so far) and it’s called… “The Bolt”! Go to the right. I think it’s a good idea to hold onto the Zeus Sword for the rest of the game.
When you go right, you’ll see Charge-Bots and Laser-Bots, providing you the oppurtunity to try out your new sword. As you’ll learn, it’s pretty powerful. 4 stars. Woo.
Defeat the few robots and snatch the health crystals. Camera Bat tattletales again to a robot I like to call “Master-Laser”. He’s pretty easy though. Go to the middle of the bot. Jump when he uses the laser. Fight him from the middle. Eventually, he’ll explode. Continue on to Spider Forest. In the Spider Forest, there are little spiders, and then there are big spiders. You may take the time to laugh at the spiderwebs that have Charlotte’s Web references.
Navigate through the trampolines and vines and go to the top and fight.. Go right when you get to the top.
Go. You’ll encounter a health crystal that only gives you two, but two powerful health crystals. You’ll encounter a robot, like, 5 times the size of you. You’ll be relieved that it’s off.
Go on one of those platforms that shoot you into the air. The robot will follow you. It is immune except for one spot: the area where a clock and a tube is. Jump when it attacks the ground. When it pauses for a second, attack the area that is glowing red. Repeat this several times. Heal when necessary. And eventually, the thing will explode…Then, a myserious flying gold thing will fly and open… showing… him. E. Vile. As a hologram.After you say that, E. Vile’s hologram will shut off and fly away. Your space shuttle will appear and you go in, saying “I’ll find you, E. Vile".
Unlockable Prizes:
For All: Skull Mask and Rusty Relic
 |
| A mask hidden in the first cave |
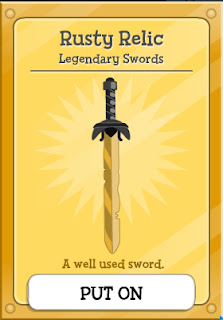 |
| First Sword |
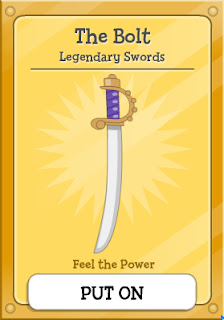 |
| The second sword |
 |
| Prize for completing first week. |